Follow Me On Social Media!


Stained Glass Cookies: Irresistibly Sweet and Colorful Treats
Introduction to Stained Glass Cookies
Stained glass cookies are a delightful blend of artistry and flavor, resembling vibrant, colorful windows that beckon you to indulge. As a child, I remember the joy of rolling and cutting out shapes with my mother, her laughter mixing with the sweet aroma of sugar and vanilla. That enchanting feeling is the heart of stained glass cookies—a recipe that captures not just a treat but a memory.
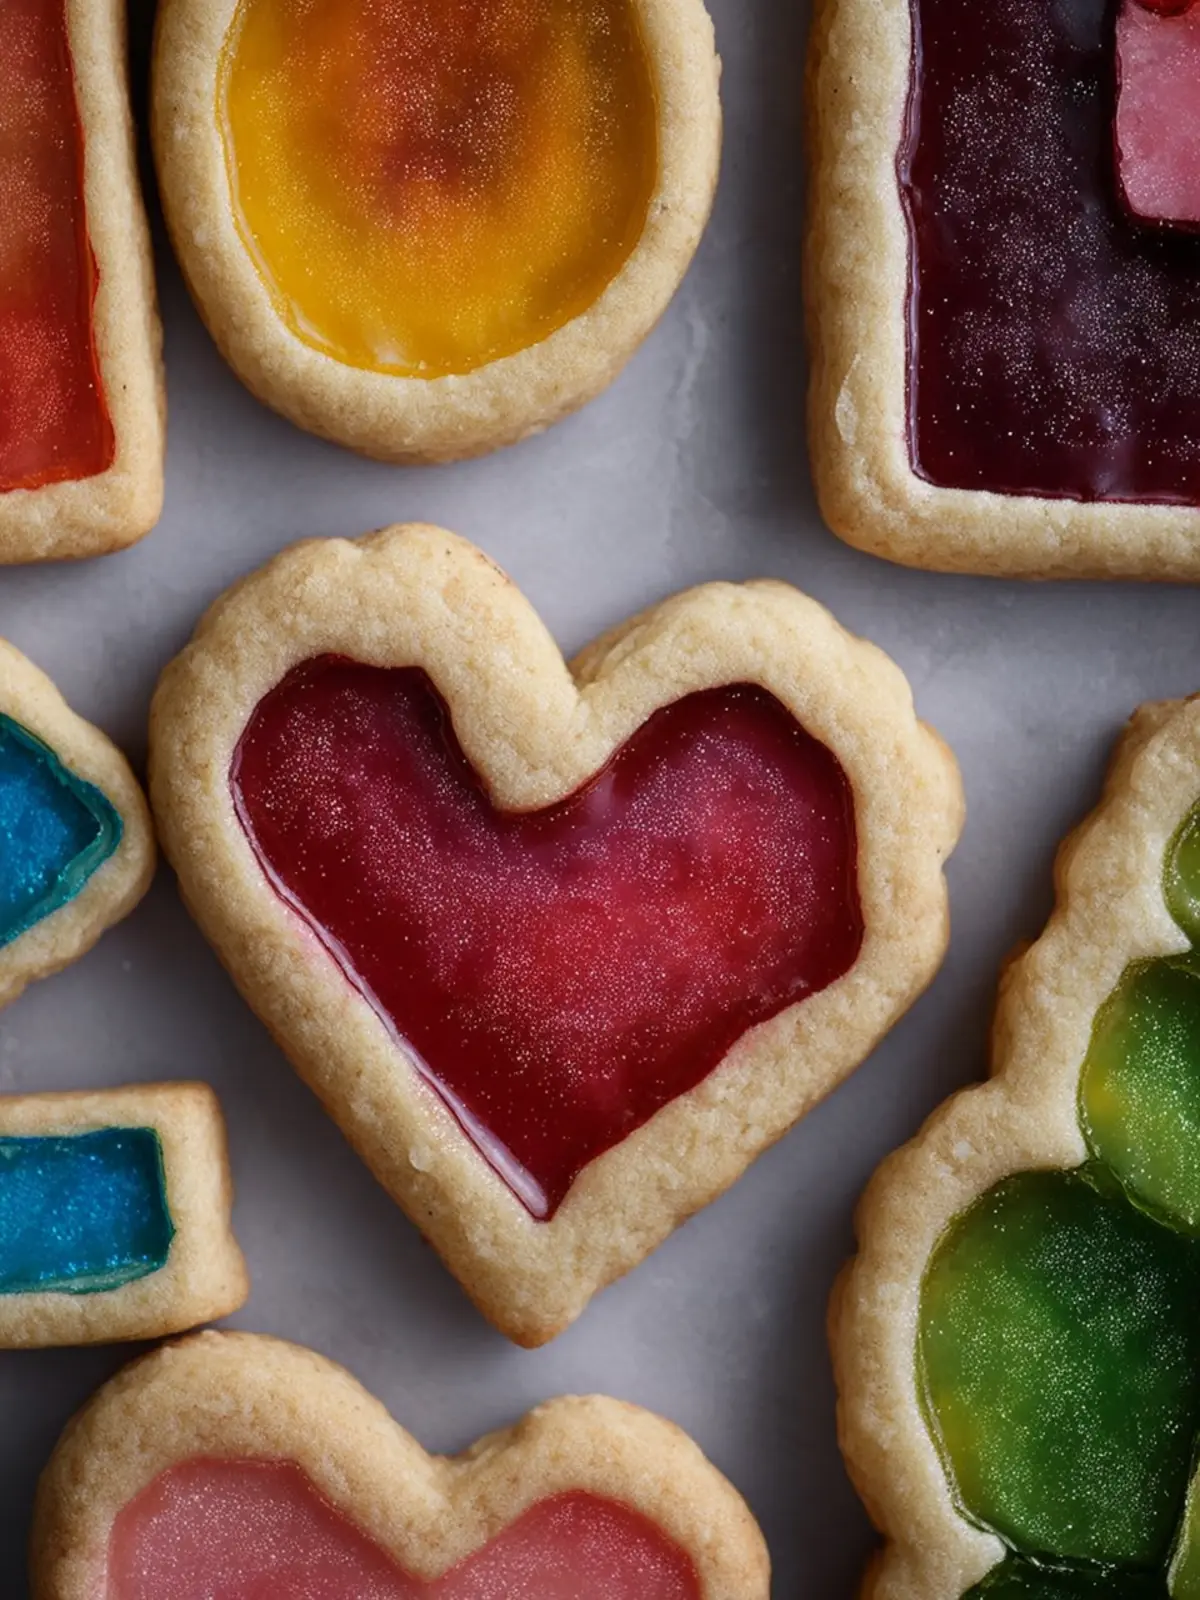
Originating from the whimsical corners of holiday baking, stained glass cookies stand out with their captivating translucent centers made from melted candies. The process of creating these treats is as rewarding as the final product. Imagine cutting out festive shapes like stars, hearts, or snowmen, with the anticipation of watching the colors of the candies come to life in the oven. It’s a simple but magical experience, perfect for gatherings, family activities, or even a cozy day at home.
The beauty of stained glass cookies is that they are easily customizable. Whether you choose traditional Christmas colors like red and green or opt for a spring palette of pastel hues, the visual appeal is immense. There’s something special about watching friends and family marvel at the cookies’ beauty before diving in for a taste.
In this recipe, I’ll guide you through each step—from preparing the dough to melting the candies and finally decorating these sweet masterpieces. You might be wondering if this is too complicated or time-consuming, but worry not! The process is straightforward, making it a fantastic project for both novice bakers and seasoned pros. Plus, these cookies make for wonderful gifts. Packaging them in a clear bag with a colorful ribbon adds that personal touch.
So gather your ingredients, channel your creativity, and let’s embark on this sweet journey of crafting stained glass cookies. Not only will they brighten up your cookie tray, but they’ll also create lasting memories in the kitchen, just like they did for me.
Key Ingredients for Stained Glass Cookies
Creating stained glass cookies is like crafting edible art that captures the vibrant hues of a stained glass window. To achieve the perfect balance of flavor and visual appeal, let’s explore the essential ingredients that bring this delightful recipe to life.
-
Butter: I always use unsalted butter, which lends a rich flavor to the dough. It’s crucial to let it soften before mixing, as this helps achieve that light, airy crumb that makes these cookies so special.
-
Sugar: A blend of granulated sugar and brown sugar gives the cookies the ideal sweetness and a hint of chewiness. Brown sugar adds moisture, creating a delightful contrast with the crispy edges.
-
Eggs: Eggs serve as the binder, helping the cookies hold their shape while providing a tender texture. Make sure to use large eggs for consistency.
-
Flour: All-purpose flour is my go-to, as it provides the structure needed for these cookies to maintain their form. If you want to experiment, a gluten-free flour blend might work well too.
-
Cornstarch: Adding cornstarch to the dough ensures that the cookies are perfectly tender, preventing them from becoming too tough during baking.
-
Candy Melts: These colorful melts are the stars of the show, transforming your cookies into the beautiful stained glass effect after baking. Choose a variety of colors for the most striking presentation.
With these key ingredients, you’ll be well on your way to creating stunning stained glass cookies that are as fun to make as they are to eat!
Why You’ll Love These Stained Glass Cookies
Stained glass cookies might just be your new favorite treat, and here’s why: they are not only visually stunning but also incredibly fun to make. Picture a cheerful afternoon in your kitchen, flour dusting your countertops as you roll out vibrant cookie dough and create unique designs that reflect your personality. Each cookie is a tiny masterpiece, and you’ll find that sharing them at gatherings or on special occasions creates joyful moments.
The process is surprisingly straightforward, making it an ideal baking project for both beginners and seasoned pros. As you cut out shapes and watch the colorful candies melt to form that enchanting glass-like effect, you’ll be intrigued and delighted. Plus, they offer a great canvas for creativity, allowing you to experiment with colors and shapes.
Here’s what to expect: a delightful crunch on the outside and a soft, chewy center, all while bursting with playful, sweet flavors. Imagine the compliments you’ll receive when you present these beauties on a platter! With every bite, you’ll enjoy a sweet reminder of your sugar-spun creativity. Don’t forget, these cookies are not just treats; they’re also great conversation starters at any event! So gather your friends and dive into the fun of making your own stained glass cookies.

Tips for Making Perfect Stained Glass Cookies
Creating the ultimate stained glass cookies is quite an adventure. With each colorful masterpiece, you’re not just baking; you’re uncovering the art of cookie-making that fuses flavor with beautiful design. Here are some thoughtful tips to help you achieve those stunning results every time.
Choose Your Candies Wisely
Opt for clear, hard candies to fill the cutouts in your cookies. Brands like Jolly Rancher are fantastic because they maintain their color and won’t leave an unpleasant taste. If you’re feeling playful, mix a variety of colors to create a dazzling effect that sparkles when light hits your cookies.
Chill the Dough
Don’t rush this step. Chilling the dough for at least an hour will help maintain that perfect shape while baking. A well-chilled dough is less sticky and provides a cleaner edge, ensuring that your cookie outlines remain sharp and beautiful.
Be Mindful of Baking Time
While every oven is different, a general rule of thumb is to watch for a slight golden bubble at the edges of your cookies. Overbaking can lead to hard, dry cookies, while underbaking might result in a flop. Set a timer but keep an eye on them during the last few minutes.
Let Them Cool Fully
Patience pays off! Allow your stained glass cookies to cool completely before handling. This will ensure that the candy centers have hardened, making them easier to move without breaking.
With these tips in mind, you’ll be ready to not just make beautiful cookies, but also craft edible art that will impress your friends and family. Happy baking!
Time Details for Stained Glass Cookies
Creating stained glass cookies is a delightful baking experience, and knowing the timing can help you manage your kitchen adventure seamlessly.
Preparation Time
The initial prep work for these enchanting cookies takes about 30 minutes. This includes mixing the dough, rolling it out, and cutting out shapes—definitely a joyful process, especially when involving friends or family!
Chilling Time
After preparation, the dough needs a little chill time in the refrigerator. Plan for at least 1 hour to ensure the cookies firm up properly, making them easier to handle for cutting and baking.
Baking Time
Once your cookies are ready, they only need about 8–10 minutes in the oven. Keep a close eye on them—they’re best when slightly golden around the edges!
Total Time
In total, you’re looking at around 1 hour and 40 minutes from start to finish, including chilling and baking. With these cookies, your patience will be rewarded with a stunning treat perfect for any occasion.

Nutritional Information for Stained Glass Cookies
When indulging in stained glass cookies, understanding their nutritional profile can enhance your enjoyment and preparation. These vibrant treats are not only a feast for the eyes but also contain specific nutrients that merit consideration.
Calories
Each cookie serves up approximately 100 calories, making them a delightful, sweet treat without overwhelming your dietary goals.
Protein
The protein content is relatively low, at about 1 gram per cookie. While these cookies are not a primary protein source, they provide a fun addition to a balanced diet.
Sodium
With around 50 milligrams of sodium per serving, stained glass cookies keep salty cravings at bay, allowing you to indulge guilt-free.
Enjoying a sugary treat like these cookies doesn’t have to derail your health journey—just savor them in moderation!
FAQs about Stained Glass Cookies
When it comes to crafting delightful stained glass cookies, questions often arise to make your baking experience seamless. Let’s address some common inquiries to help you out!
Can I use different flavored extracts?
Absolutely! While vanilla extract is the classic choice for stained glass cookies, feel free to experiment with other flavors. Almond, lemon, or even peppermint extracts can add a unique twist to your cookies. Just keep in mind that stronger extracts might require less quantity, so start with a teaspoon and adjust to taste.
How do I store the cookies?
To keep your stained glass cookies fresh and vibrant, store them in an airtight container at room temperature. They can last up to a week. For longer storage, consider layering them with parchment paper to avoid sticking and separating each layer. If your kitchen is particularly warm, it’s best to keep them in a cool, dark place.
What types of hard candy work best?
The beauty of stained glass cookies lies in the colorful center, so opt for hard candies with vibrant hues. Common choices include Jolly Ranchers, Life Savers, or even crushed Werther’s Originals. Just remember to crush the candies into small bits before baking—they should resemble coarse sand for the best melting effect!
Can I freeze the dough?
Definitely! Freezing the dough for your stained glass cookies is a great way to prepare in advance. After mixing, wrap the dough tightly in cling film or place it in an airtight container. You can freeze it for up to three months. When you’re ready to bake, simply thaw it in the refrigerator overnight before rolling and cutting into shapes.
These insights should make your stained glass cookie baking adventure all the more enjoyable! Happy baking!
Conclusion on Stained Glass Cookies
In conclusion, stained glass cookies not only dazzle the eyes but also bring a delightful crunch and sweetness to any occasion. These cookies are perfect for holidays, gatherings, or simply to brighten up your week. With the vibrant colors shining through the cookie, they become a centerpiece that’s sure to impress your friends and family. Remember, using high-quality gelatin candies will enhance that stained glass effect, making each bite a burst of flavor. So, gather your ingredients, unleash your creativity, and get ready to enjoy this whimsical treat together with loved ones. Happy baking!
Print
Stained Glass Cookies
- Total Time: 2 hours 40 minutes
- Yield: 24 cookies 1x
Description
These stained glass cookies are a fun and festive treat perfect for any occasion!
Ingredients
Scale
- 3 cups all-purpose flour
- 1 teaspoon cream of tartar
- 1 teaspoon salt
- 1 cup butter (room temperature)
- 1 cup sugar
- 2 large eggs
- 1 teaspoon vanilla extract
- 1/2 teaspoon almond extract
- 20–30 pieces crushed hard candy (Life Savers, Jolly Ranchers, or other hard candy)
Instructions
- In a medium-sized bowl, whisk together the flour, cream of tartar, and salt and set aside.
- Place room temperature butter and sugar in the bowl of a stand mixer and cream with the paddle attachment until light and fluffy—about 3 minutes.
- Slowly add the eggs, almond extract, and vanilla extract and mix again until combined.
- Add the flour mixture to the butter mixture and mix until combined. Scrape the bowl to make sure that all of the butter mixture has mixed in completely.
- Cover with plastic and chill in the fridge for about 2 hours (or overnight).
- Preheat oven to 325 degrees F.
- Sprinkle the counter and rolling pin lightly with flour. Roll the dough on your floured surface until it is about 1/4″ thick.
- Cut cookies out into desired shapes, then use a smaller cookie cutter to cut out small shapes inside each cookie to make a stained glass window.
- Place on a baking sheet lined with parchment paper at least 1″ apart.
- Add the crushed candy and fill with as much candy as possible without overfilling the hole.
- Bake in a preheated 325 degree F oven for 8-10 minutes, or until the edges are set and there is just a hint of golden brown color.
- Let the cookies cool for about 2 minutes on the baking sheet before transferring them to a countertop to cool completely.
- Enjoy!
Notes
- Cookies can be stored in an airtight container for up to a week.
- Experiment with different shapes and colors of hard candy for a unique look!
- Prep Time: 30 minutes
- Cook Time: 10 minutes
- Category: Dessert
- Method: Baking
- Cuisine: American
Nutrition
- Serving Size: 1 cookie
- Calories: 120
- Sugar: 10g
- Sodium: 50mg
- Fat: 6g
- Saturated Fat: 4g
- Unsaturated Fat: 2g
- Trans Fat: 0g
- Carbohydrates: 15g
- Fiber: 0g
- Protein: 1g
- Cholesterol: 25mg